The Basics of Astrophotography
Astrophotography is a captivating blend of art and science that allows us to capture the wonders of the night sky in stunning detail. Whether you’re drawn to photographing the Milky Way, capturing the intricate details of the moon, or shooting mesmerizing star trails, understanding the basics of astrophotography is essential for beginners. In this blog post, we’ll explore the necessary equipment, camera settings, and techniques needed to start your astrophotography journey in 2025. From choosing the right camera and lenses to mastering post-processing skills, we will guide you through each step to help you capture breathtaking celestial images.
Astrophotography for Beginners 2025
Camera Bodies and Lenses
The first step in astrophotography is choosing the right camera body. While DSLRs have traditionally been popular, mirrorless cameras are increasingly favored for their lightweight frames and electronic viewfinders. Your camera should allow manual mode adjustments and support long exposure shots.
When it comes to lenses, fast wide-angle lenses (with a focal length of 14-24mm and an aperture of f/2.8 or lower) are ideal for capturing vast sections of the night sky. Lenses with low aperture values let in more light, which is crucial for capturing detailed and vibrant celestial images.
Additional Equipment for Astro
Alongside your camera and lens, a sturdy tripod is paramount to prevent camera shake during long exposures. Moreover, investing in a good star tracker can aid in tracking the motion of the stars, allowing for longer exposures and more detailed star fields.
Other useful equipment includes a remote shutter release or intervalometer to minimize physical contact with the camera, achieving sharper images. A good headlamp with a red light can help in navigating the dark without ruining your night vision.
Tripod (Essential)
A reliable tripod is a cornerstone of astrophotography, anchoring your camera for long exposure shots. Stability is crucial as even the slightest movement can blur your starry captures. Invest in a tripod with sturdy legs and a smooth pan-and-tilt head.
When selecting a tripod, ensure it’s suitable for the terrain you’ll frequently encounter. Lightweight carbon fiber models are excellent for travel and hiking to remote locations, where you might not have the smoothest ground.
Remote Shutter Release (Recommended)
Utilizing a remote shutter release can significantly increase the sharpness of your images. It prevents your hand from inducing any vibration while pressing the shutter button, thus enabling clearer pictures.
Wireless models offer more flexibility compared to their tethered counterparts, allowing you to trigger your camera without being bound by cables, thereby granting you creative freedom in composition and lighting techniques.
Intervalometer (Optional)
An intervalometer is a versatile tool for those eager to explore more complex astrophotography tasks like time-lapses or stacking. It schedules multiple shots automatically at set intervals, ensuring consistency in your images.
Though optional, an intervalometer offers immense creative possibilities, especially when capturing the celestial dance of stars across the night sky over extended periods.
Headlamp
Planning Your Astro Shoot
Planning is key to a successful astrophotography session. Check weather forecasts to select a night with minimal cloud coverage. Additionally, monitoring the moon phase can influence your shoot; a new moon offers the darkest skies.
Utilize apps or online resources to track celestial events and star alignment. Familiarizing yourself with the location during daylight hours can help in setting perfect compositions once darkness falls.
Location
Choosing a remote location with minimal light pollution is ideal for astrophotography. Dark-sky reserves or rural areas far from city lights provide the best conditions for capturing vibrant starscapes.
Once a location is selected, consider visiting during the day to scout promising angles and familiarize yourself with the terrain. This preparation ensures smoother navigation and setup when you return under the cover of night.
Subject
Astrophotography Settings for Your Camera
With settings, start with your camera in manual mode. Set your aperture to the widest (lowest f-number) available for your lens to let in maximum light, which is crucial for night photography.
Adjust the shutter speed to capture enough light without causing star trails, often using the 500 Rule, where you divide 500 by your lens’s focal length to determine the maximum exposure time before trails begin to form.
Camera Shooting Mode
Shooting in manual mode is a necessity for astrophotography as it grants full control over all camera settings. It allows precise adjustment of ISO, aperture, and shutter speed, tailoring them to capture the night sky perfectly.
Manual mode ensures that consistency is maintained throughout your shots, which is essential for tasks like stacking or creating time-lapses where the ambient lighting conditions are fixed.
Aperture
The aperture is crucial in determining how much light hits your camera sensor. A wide aperture (smallest f-number your lens offers) allows more light, which is essential in low-light conditions inherent in astrophotography.
Be mindful of your lens’s “sweet spot” — the aperture setting which provides optimal sharpness. Though wide apertures capture more light, stopping down slightly can increase image sharpness and reduce optical aberrations.
Image File Type
For astrophotography, shooting in RAW format is strongly recommended. RAW files retain maximum detail and dynamic range, providing greater flexibility in post-processing where adjustments to exposure, white balance, and color can be fine-tuned.
While JPEGs are more convenient due to smaller file sizes and immediate usability, they lack the depth and flexibility necessary for high-quality astrophotography edits which RAW files offer.
Shutter Speed
Shutter speed is a critical factor in astrophotography, with longer exposures gathering more light but increasing the risk of star trails depending on your focal length. The 500 Rule helps determine the optimal shutter speed to use.
Experiment with different shutter speeds in your chosen location, accounting for factors like camera stability and the specific celestial features you’re aiming to photograph, such as the Milky Way or a star-filled sky.
ISO Sensitivity
ISO sensitivity controls the camera sensor’s sensitivity to light. Higher ISO settings allow better capture of faint starlight, but can introduce noise, which can be detrimental to image quality.
Balancing ISO with aperture and shutter speed is key; newer cameras with advanced sensors perform better at higher ISOs with reduced noise, enabling clearer captures of the night sky.
Focusing in the Dark
Tips and Advice
Achieving perfect focus in the dark can be challenging. Autofocus is often unreliable in low light, so switch to manual focus and use live view for better precision. Zooming in on a bright star or distant light aids in achieving sharp focus.
Marking the focus point for infinity can also be helpful. This technique involves aligning your lens focus to its sharpest long-distance setting, ensuring distinctly sharp stars in your images.
Foreground
Incorporating foreground elements adds depth and interest to your astrophotography, juxtaposing the vastness of the sky with relatable earthly features. Trees, mountains, and buildings can create impactful compositions.
When planning your shot, consider how the foreground elements interact with the sky and celestial subjects. This interaction can transform a standard night sky photo into a compelling narrative scene.
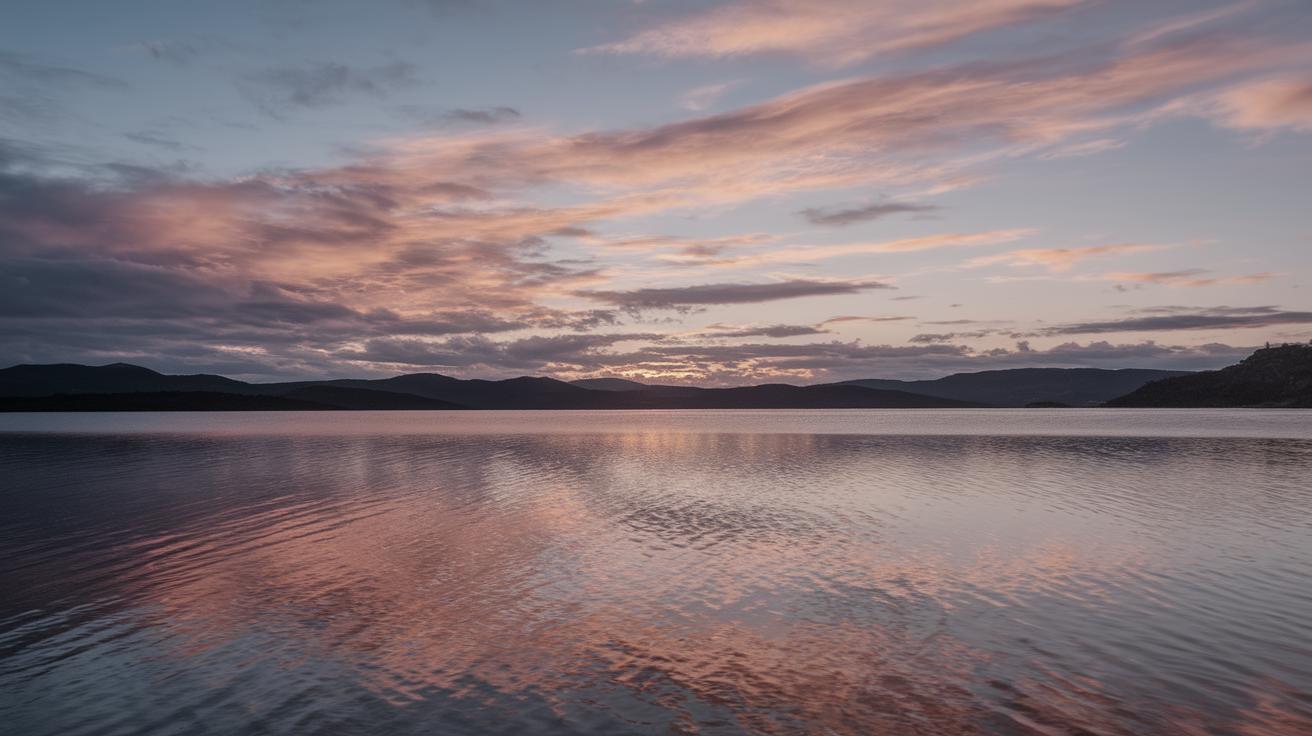
Reflections
Utilizing reflections can enhance your astrophotography by doubling visual interest and creating symmetry within your compositions. Bodies of water like lakes or still ponds can reflect the stars or Milky Way beautifully.
When shooting reflections, ensure the water is as still as possible to capture a mirror-like effect. Adjust your framing to include the reflected elements naturally, creating a balanced and harmonious image.
White Balance
White balance directly impacts the color hues in your astrophotography. Setting your camera to a manual white balance mode grants more precise control, which is vital in maintaining accurate and aesthetically pleasing star colors.
A cooler white balance typically highlights the blues in star fields, while a warmer balance can enrich the reds. Experimentation will help you discover the settings that best complement your artistic vision.
Get the Space.com Newsletter
For ongoing tips, updates, and news in the world of astrophotography, consider subscribing to the Space.com newsletter. Resources like this offer insights directly from experts in the field, keeping you informed and inspired.
Whether it’s discovering new astrophotography techniques or learning about upcoming celestial events to capture, staying connected with the community enhances your learning and passion for the night sky.
Future Prospects
| Aspect | Details |
|---|---|
| Equipment | DSLRs or mirrorless cameras, wide-angle lenses, tripod, star tracker, remote shutter release, intervalometer, headlamp. |
| Location & Planning | Dark-sky areas, weather and moon phase planning, day visits to sites. |
| Camera Settings | Manual mode, RAW format, aperture, shutter speed, ISO sensitivity, focusing techniques. |
| Composition Elements | Foreground inclusion, reflections, white balance adjustments. |
| Resources | Space.com newsletter for ongoing education and community involvement. |
This HTML document outlines the basics of astrophotography, organized by the specified subheadings. It encompasses essential topics, techniques, and equipment considerations while providing future prospects in the form of a summary table.